Google Reviews are essential for businesses in today's competitive landscape, as they greatly influence customers' decision-making process. By utilizing Patch Automations and SmartLinks, businesses can send out Email and/or SMS messages to solicit Google Reviews, generating a higher volume of quality reviews than other methods. This help center article will guide you through the process of setting up a Review Automation using Patch's Automation Wizard, ensuring you can make the most of your clients' Google Reviews. To begin setting up your Review Automation, you will first want to ensure you have the proper Google My Business Review link. For this step, you must be an admin of the Google My Business page.
Google My Business Link
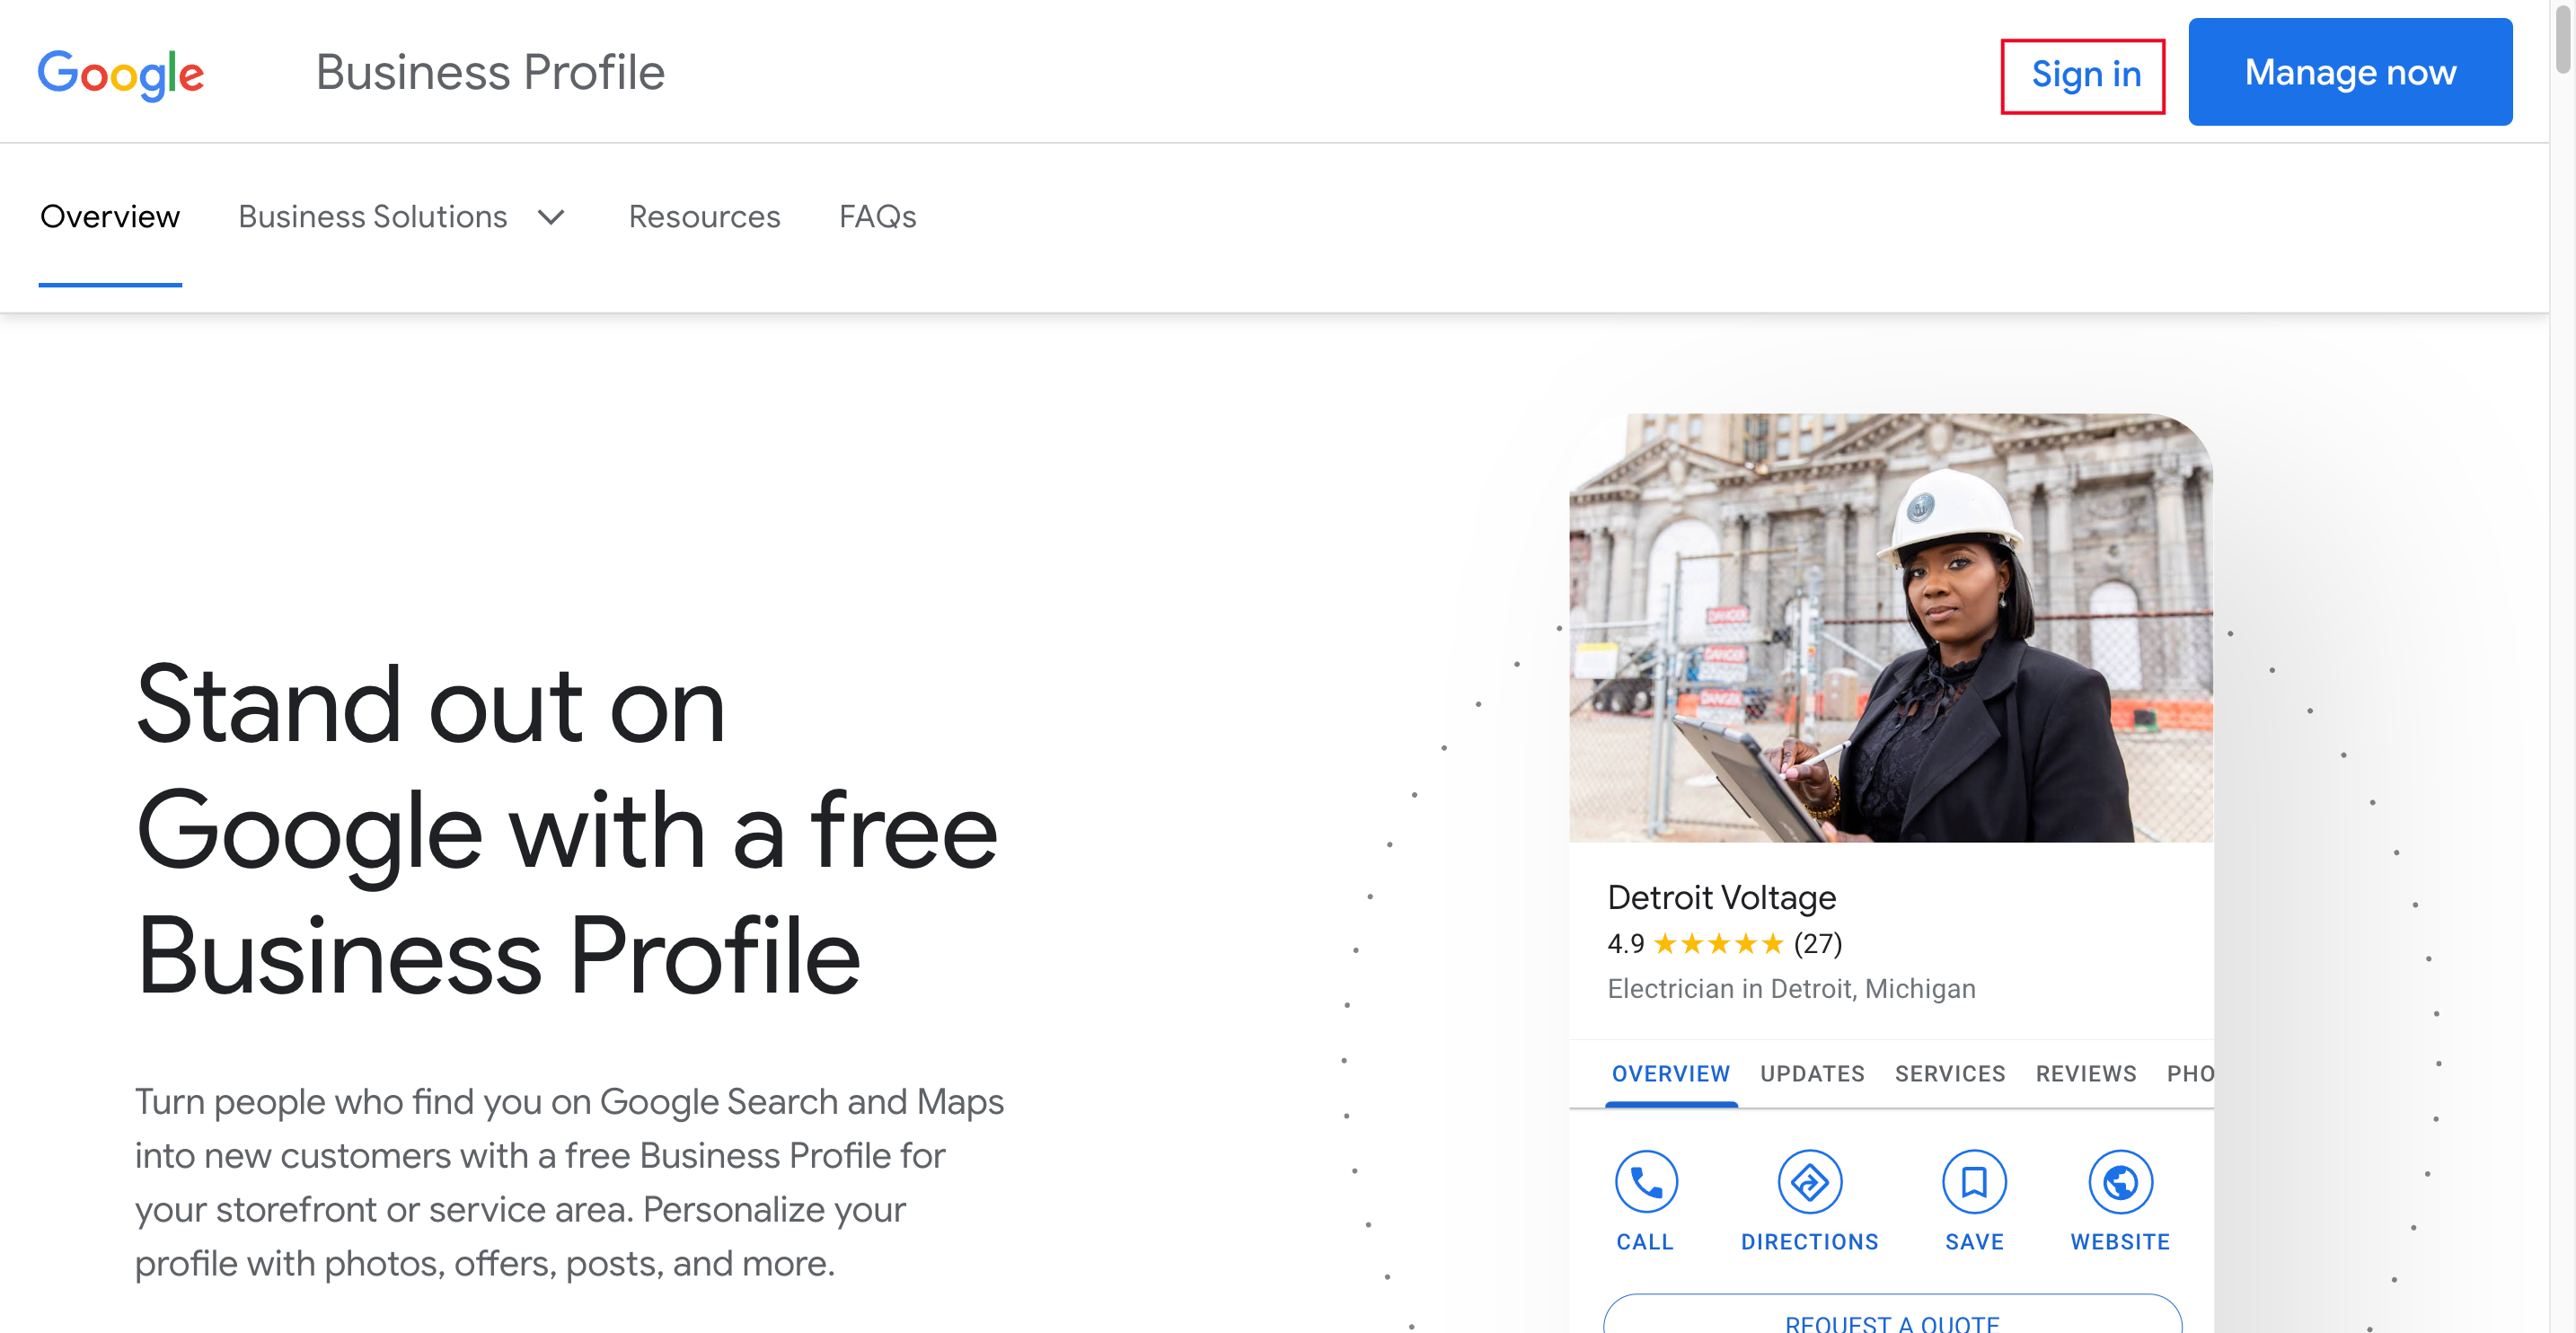
In your browser go to: https://www.google.com/business/ and then click Sign In in the top right corner of the page.
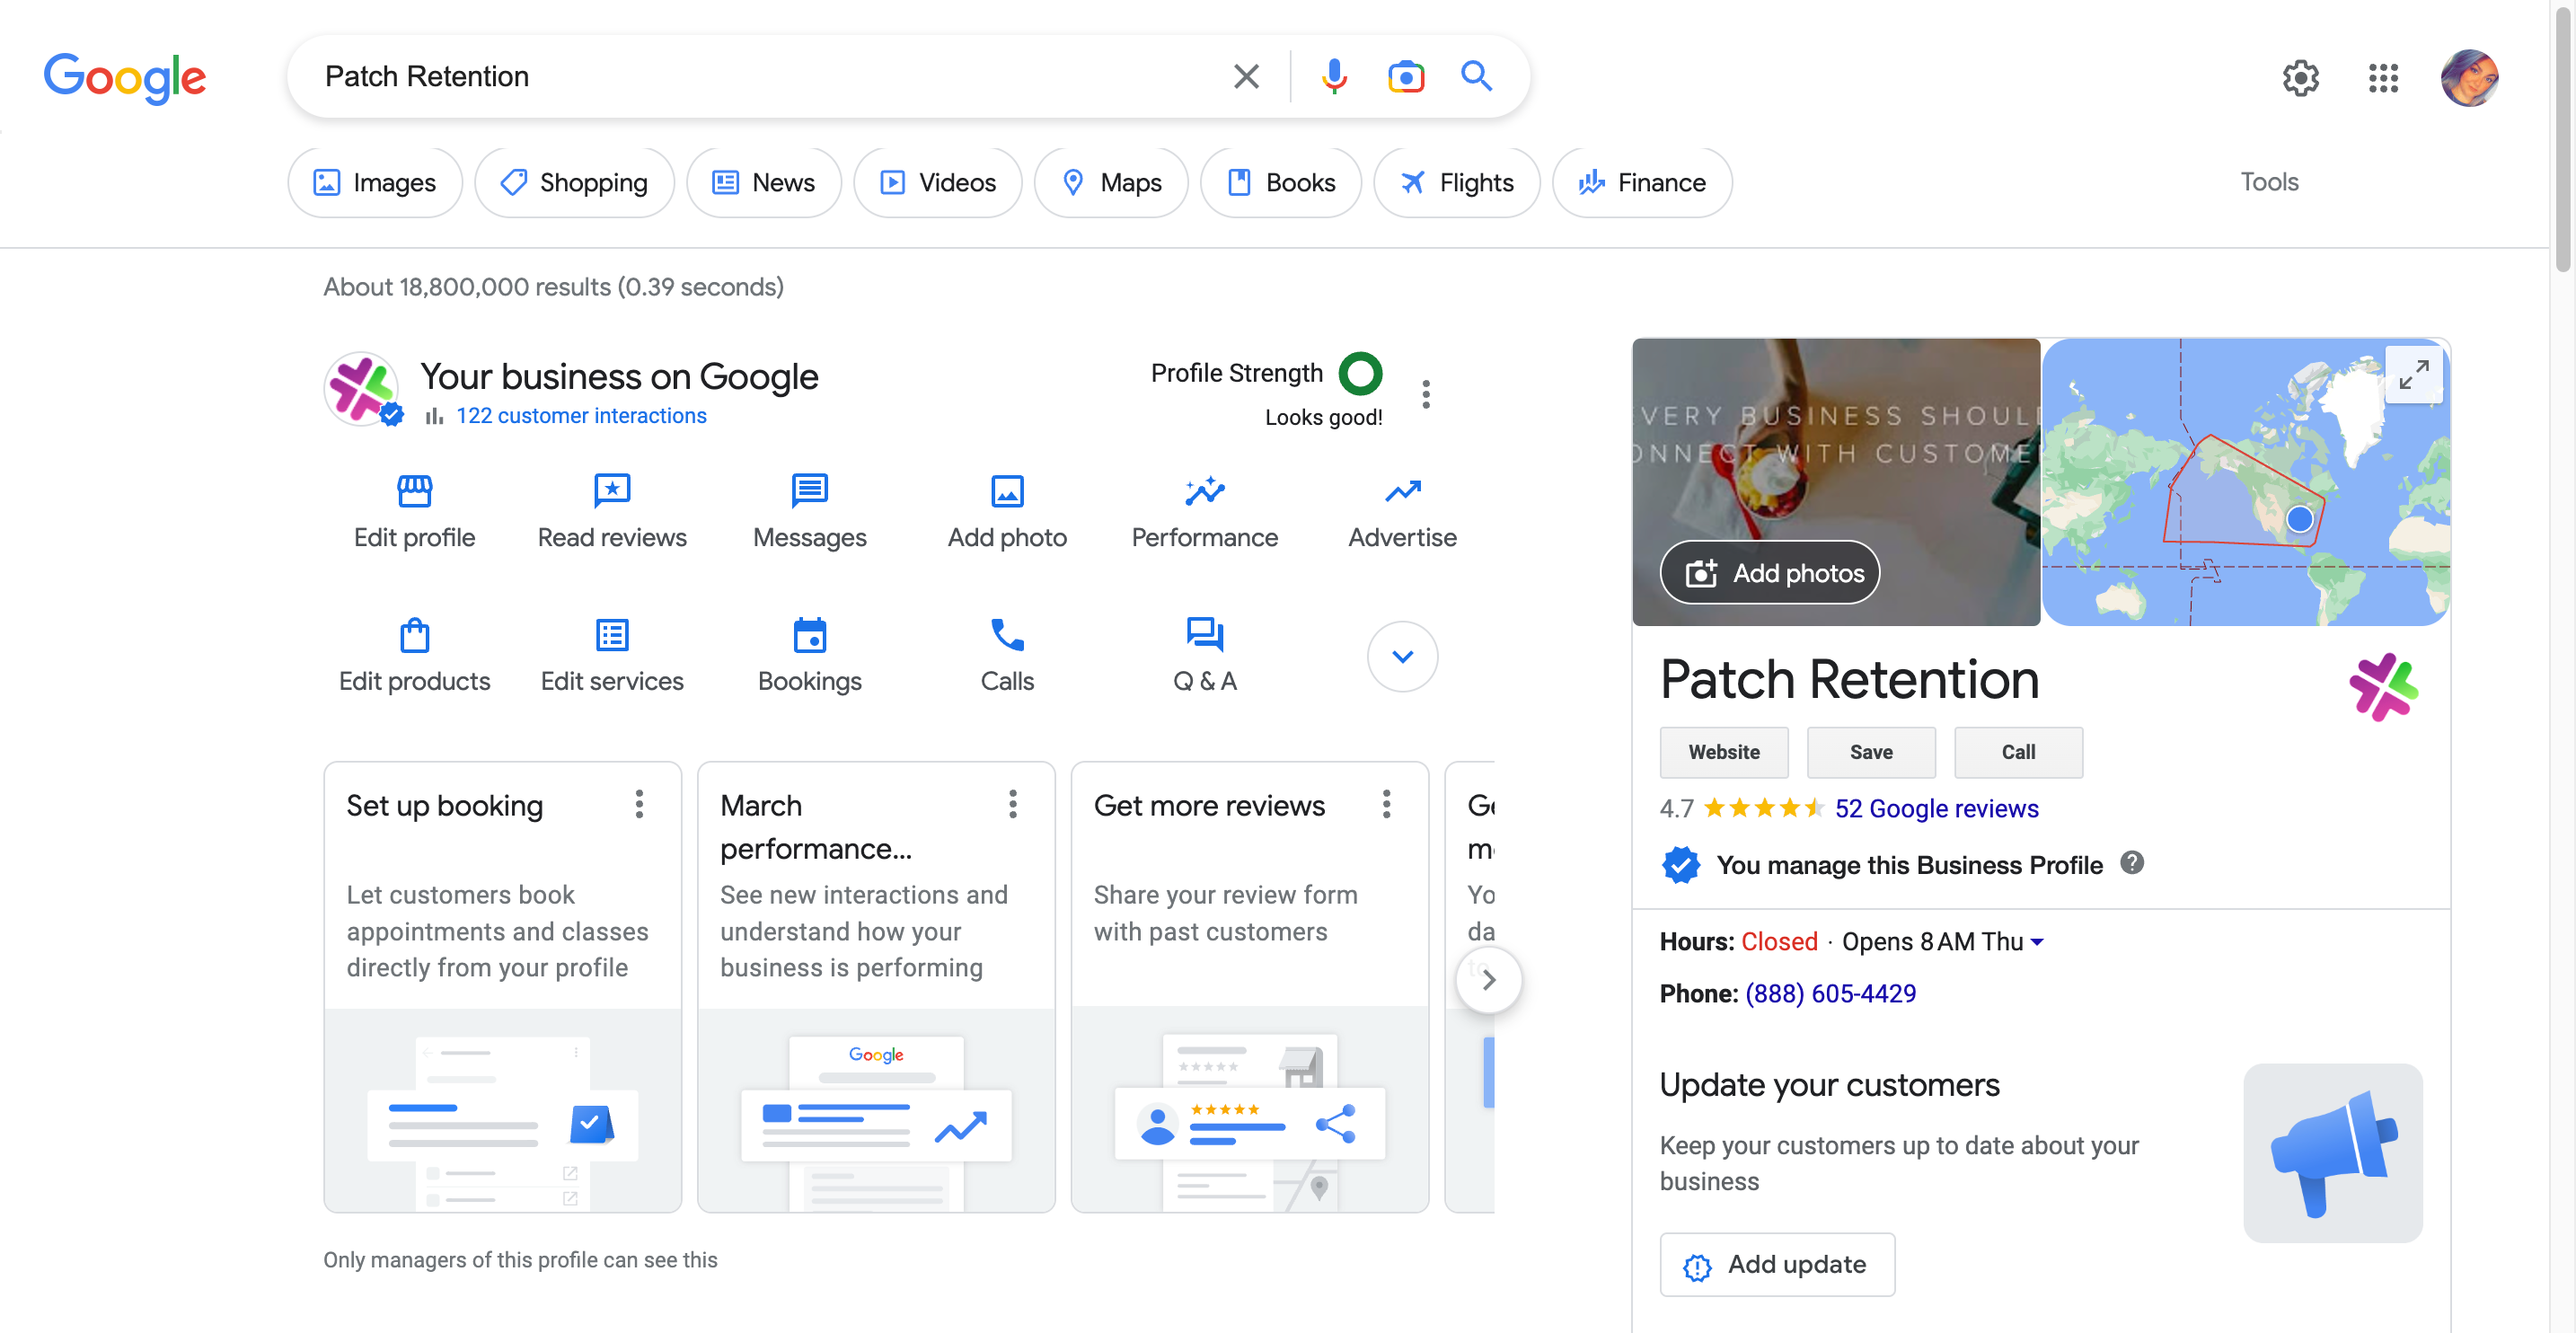
A new tab will open to a page that has already pre-searched your business name.
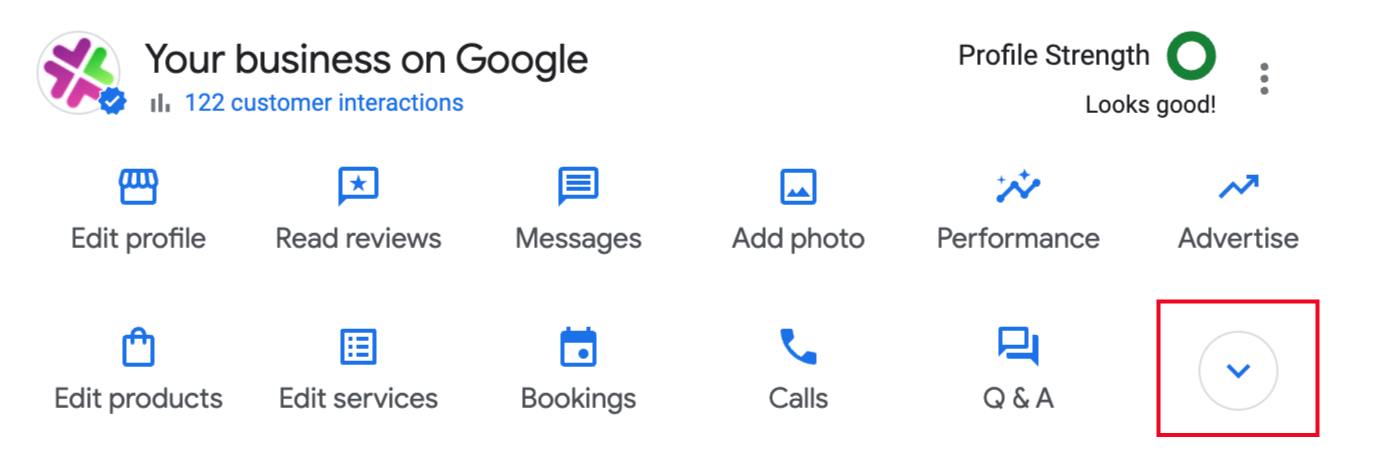
You will then want to click the blue down arrow where you see the section of icons.
Now you will see the option for 'Ask for Reviews'.
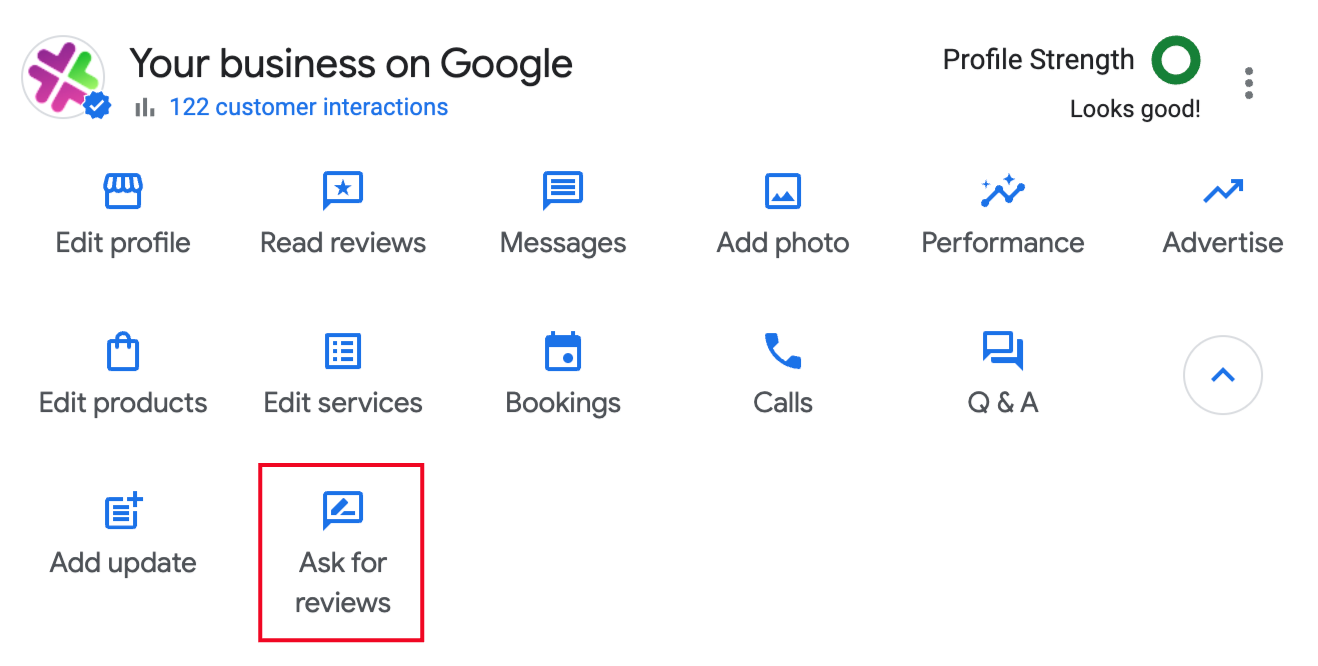
Click this icon, and a new window will pop up. You will click the copy icon to copy the Google Review link in the box.
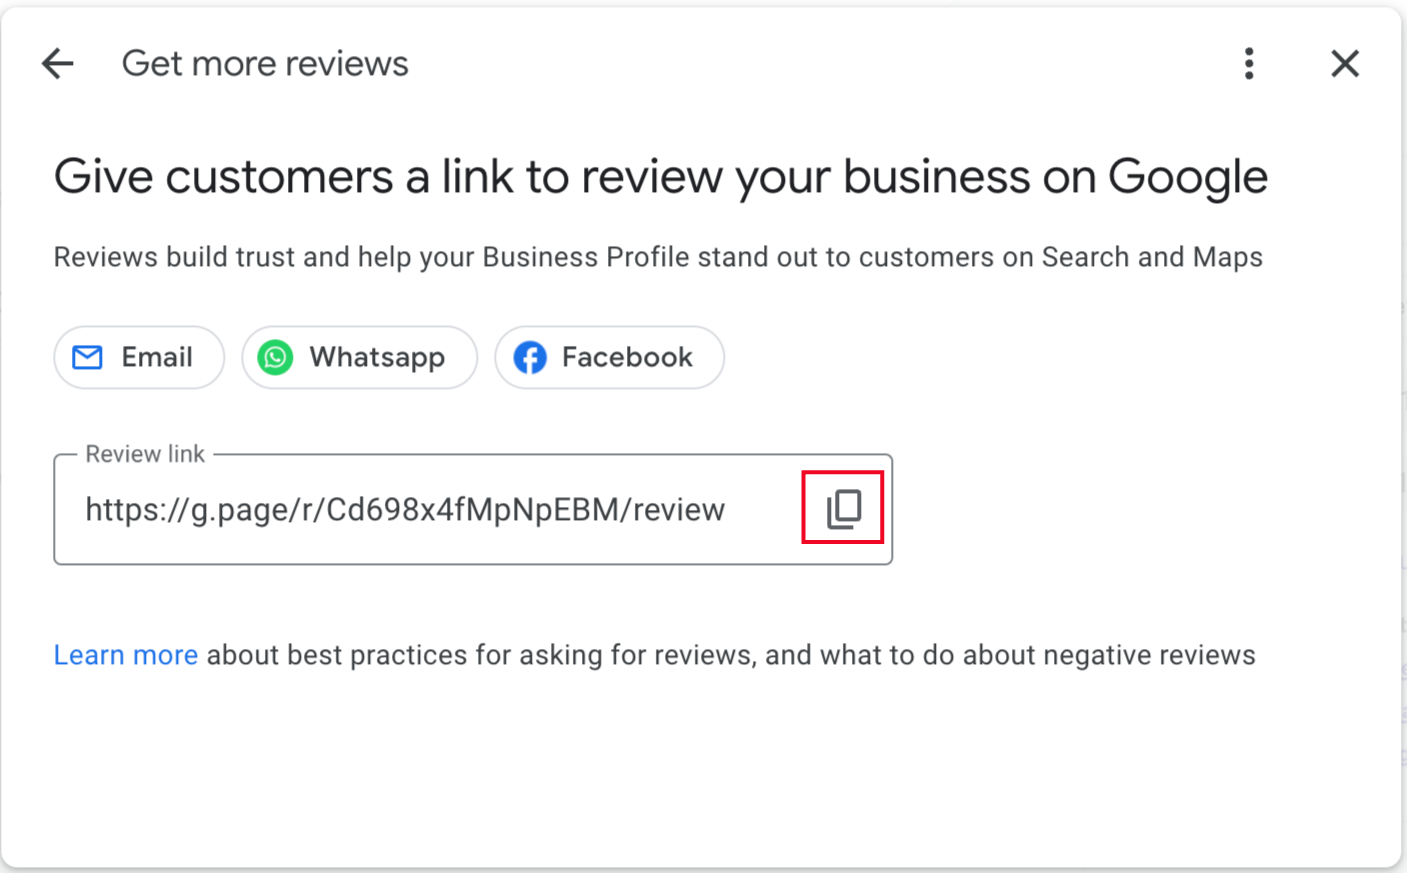
Paste this link into a notepad or somewhere easily accessible because you will use it later when setting up your Automation within Patch.
Build Your Automation using the Patch Wizard
Navigate to the Automations Module.
In the bottom right corner of the page click the purple plus icon.
Use the Automation Wizard options, not Start From Scratch.
Scroll all the way down the list of Campaigns.
Select 'Social Review Invitation'.
Rename the Automation to 'Google Review Invitation' and then click NEXT.
The next question will ask you to use the drop-down selector to pick which type of event (or customer action) you want to trigger this message to go out.
You have two options:
- Order Finished - Use this option if you want to send this message to the Customer after they have completed a purchase. You will have the option to determine the timing at which the message is sent.
- Chat Finished - Use this option if you want to send this message out to the Customer after a rep has marked a Messenger Conversation as Complete. You can apply additional filters to determine what type of conversations will or will not get this message.
For this example, we are going to select Order Finished, then click NEXT.
Now you will choose how much time you want to wait before sending the message out. In this example, we are going to select 4 hours and then manually change it later within the Delay block editor. Click NEXT.
Note - the quick menu has limited options but you can manually edit the Delay block later to any custom time.
Then choose what type of messaging you wish to use: SMS, Email, or SMS & Email. We recommended using SMS or both as SMS historically has high open rates, engagement rates, and overall great success.
For this example, we will use just SMS.
Now you will want to paste the Google Review Link you copied earlier from your Google My Business page into the input field labeled 'Enter URL'
Now all you have to do is click the CREATE button. You will then be dropped onto your pre-built Automation sequence within the Automation Canvas.
This is what the initial Automation sequence will look like:
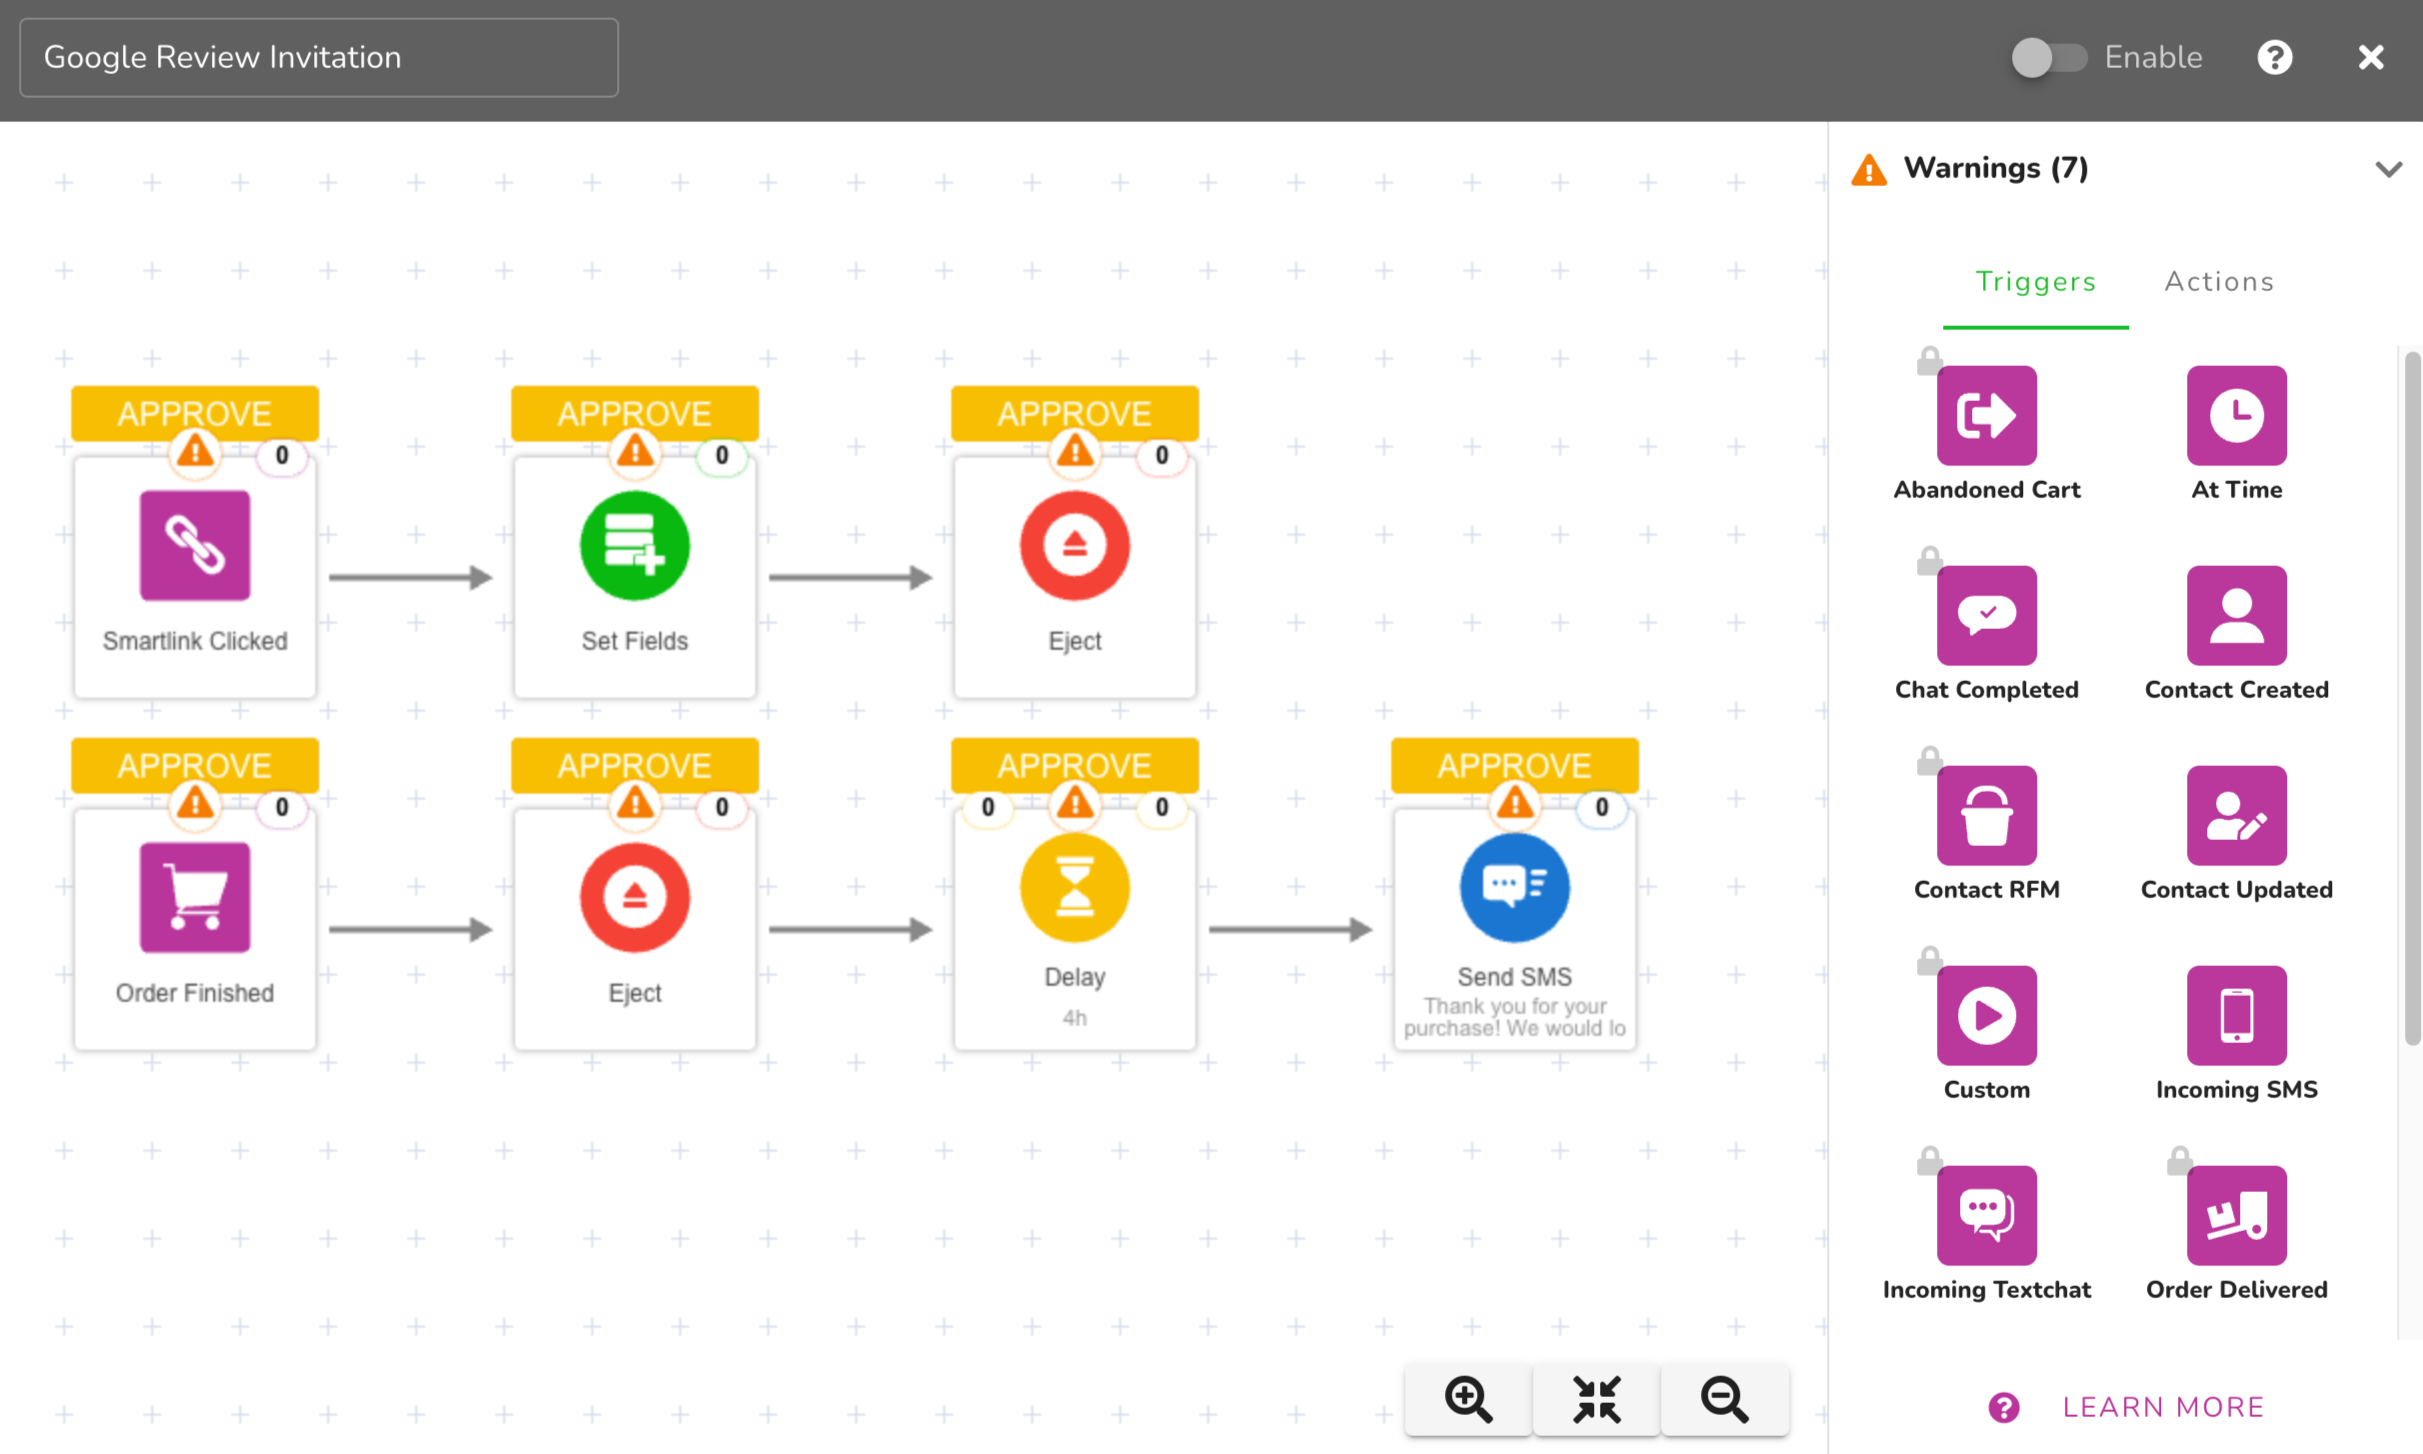 From here you will need to review and approve each of your blocks. You will want to open each block, review the details, make any necessary adjustments, and then click Save, Approve & Close when ready.
Editing Your Automation
Let's start with the SmartLink Clicked block.
Hover over the block, a sub-menu will appear under the block. Click the edit pencil to open the block settings.
When the block opens in the top dark grey bar there is a placeholder block name, you will want to update the naming to be more specific to what this block is doing. Proper naming schemas will help you later with reporting and stats. We recommend overriding the block name to include the link type 'Google Review Clicked'. Now, by default, this block is set to be based on the SmartLink that was created for you using your Google Review Link. There shouldn't really be a need to change this in the standard scenarios as anytime someone clicks the link you want to ensure they are removed from the sequence. Once you are done, click the Approve & Close button.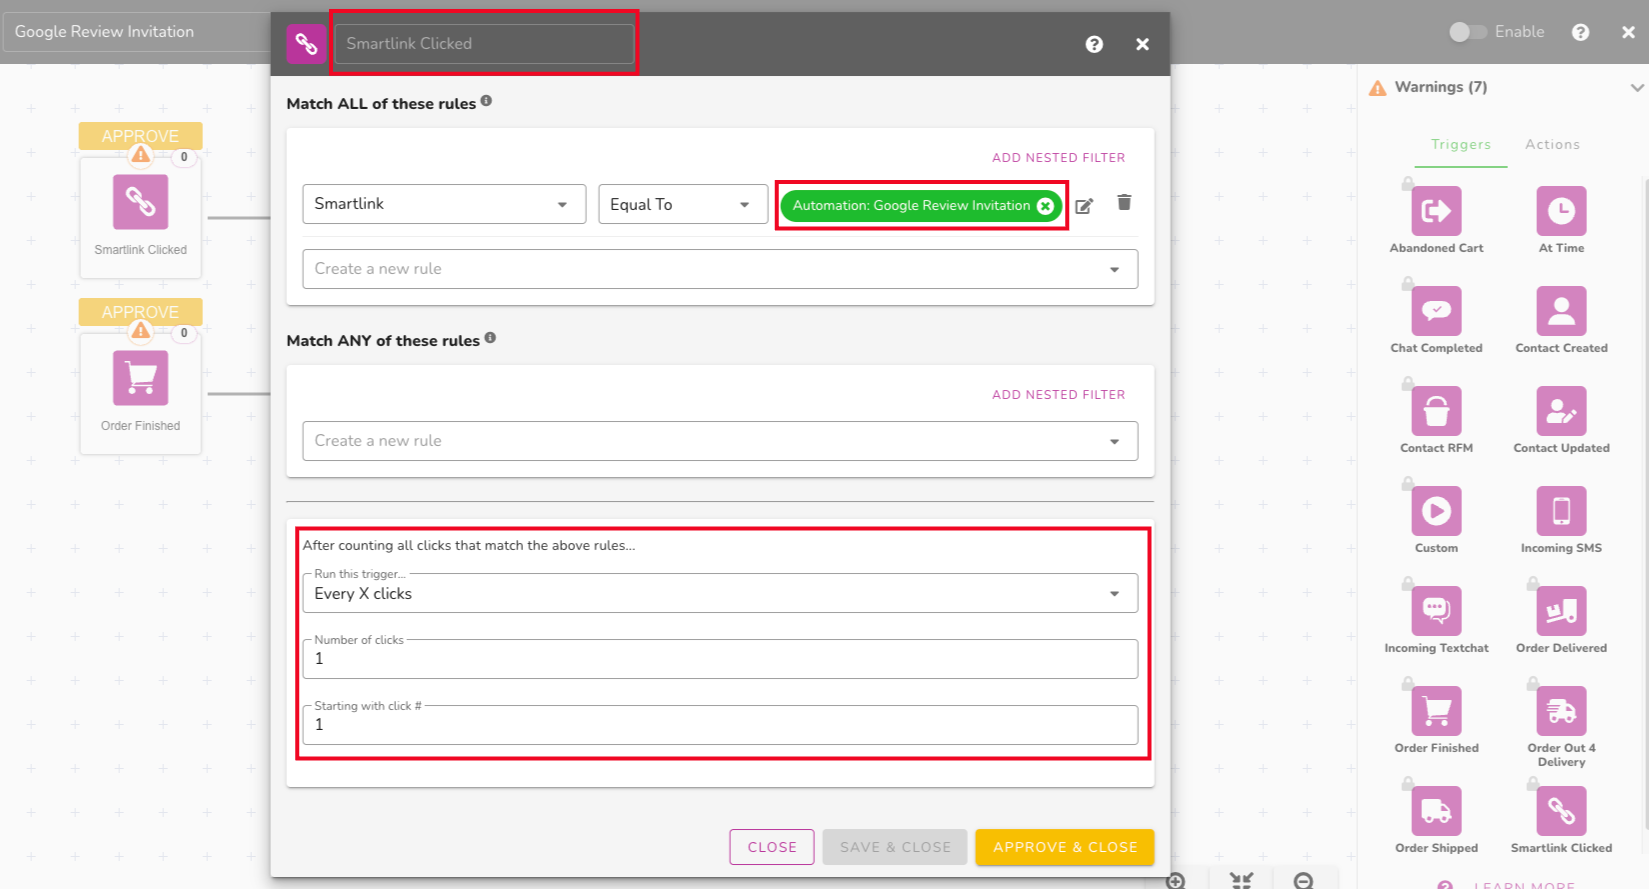 SET FIELDS
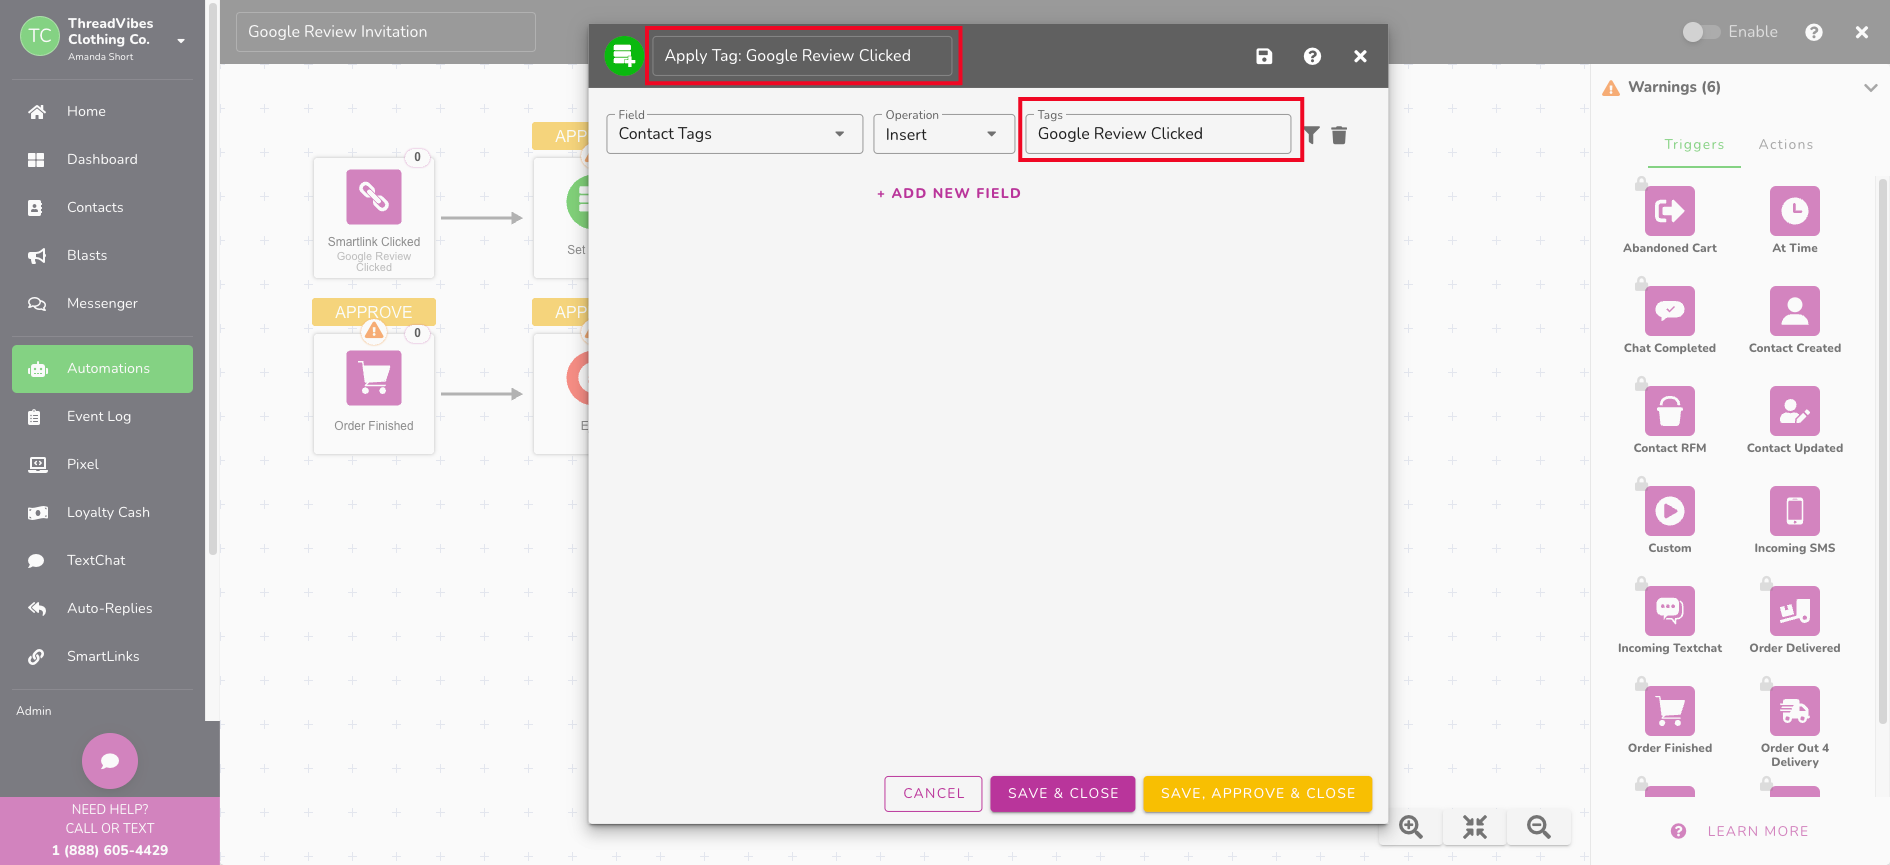
- By default, a tag has been created and inserted into the input field for you. We recommend updating the naming of this tag to something easily searched for later. Example: SMARTLINK-644a6ebd778c4eb224aca201 ➝ Google Review Clicked.
- You will also want to update the naming of this block in the dark grey bar, the default is the block name, we recommend updating it to something like Apply Tag: Google Review Clicked
Then click 'Save, Approve & Close'.
 The 'EJECT' block has no settings so you can simply click the yellow APPROVE button directly above this block.
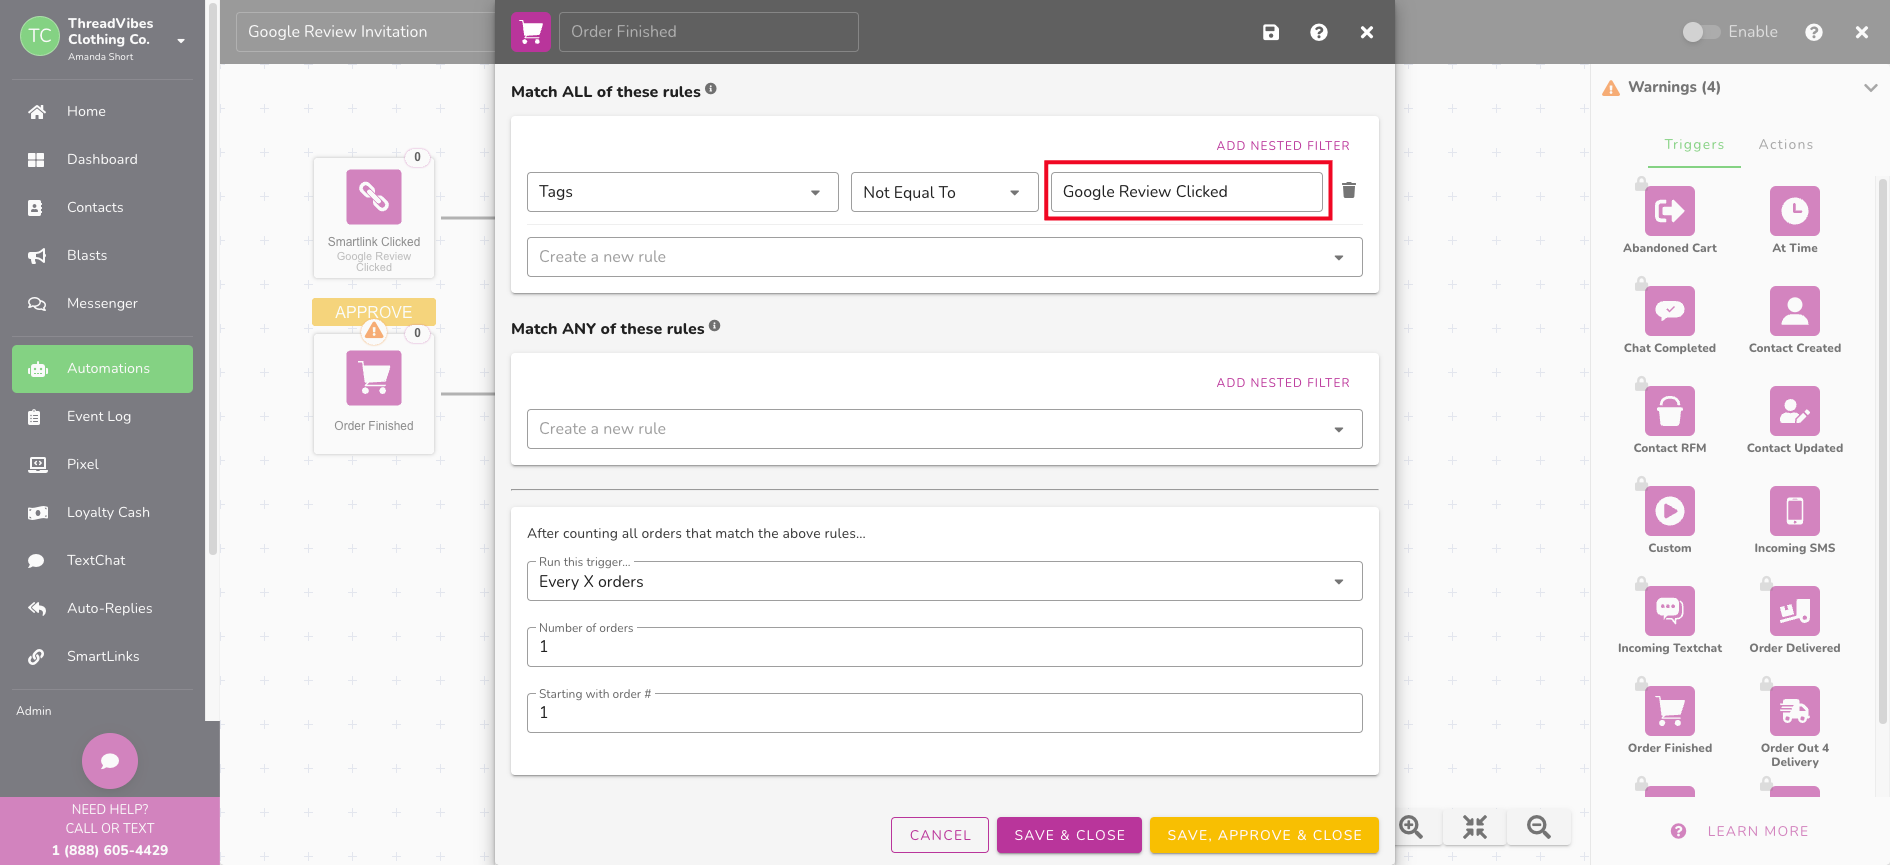
Now let's edit the 'Order Finished' block (or 'Chat Finished' if that is what you chose for your campaign).
By default, the block will include the tag that was automatically created as a filter rule, as to not include any orders for those contacts that have already clicked the link before. IF you changed your tag naming, you will need to update this input field to match the new version. For ours, we will change the text to 'Google Review Clicked'. Note the naming has to match EXACTLY.
When ready click the 'Save, Approve & Close' button.
For the 'EJECT' block, all you need to do is click the Approve button.
Now let's look at the 'Delay' block.
This block determines how much time the system will wait after the order or chat is completed before sending out the actual message. By default, the clock will be set to the timeframe chosen within the Automation Wizard. For this example, we want to ensure that the customer has had time to receive their order before soliciting a review. If you are wanting reviews based on the immediate service then you can send this out sooner or if you offer digital products where shipping timeframes do not apply. In this example, the average shipping time for the business is 3-5 days so we are going to edit the block to be set to wait 6 days.
- Hover over the Delay block
- Click the edit pencil
- Change the timeframe to 6 days.
- Click the checkbox for Enable Timeframe
- Select the Days on which you want the message to be sent (Monday-Sunday)
- Adjust the Start and End Times
- Edit the Block name based on the time you set
- Click the 'Save, Approve & Close' button.

Lastly, you will need to open the message block (SMS/Email) and review the content and copy, making any adjustments you find necessary. If not already, set your 'Send From' gateway, most accounts will use the account default. Make sure to use the Send Test feature to ensure your messaging is exactly how you want, once ready click the Save, Approve, and Close button.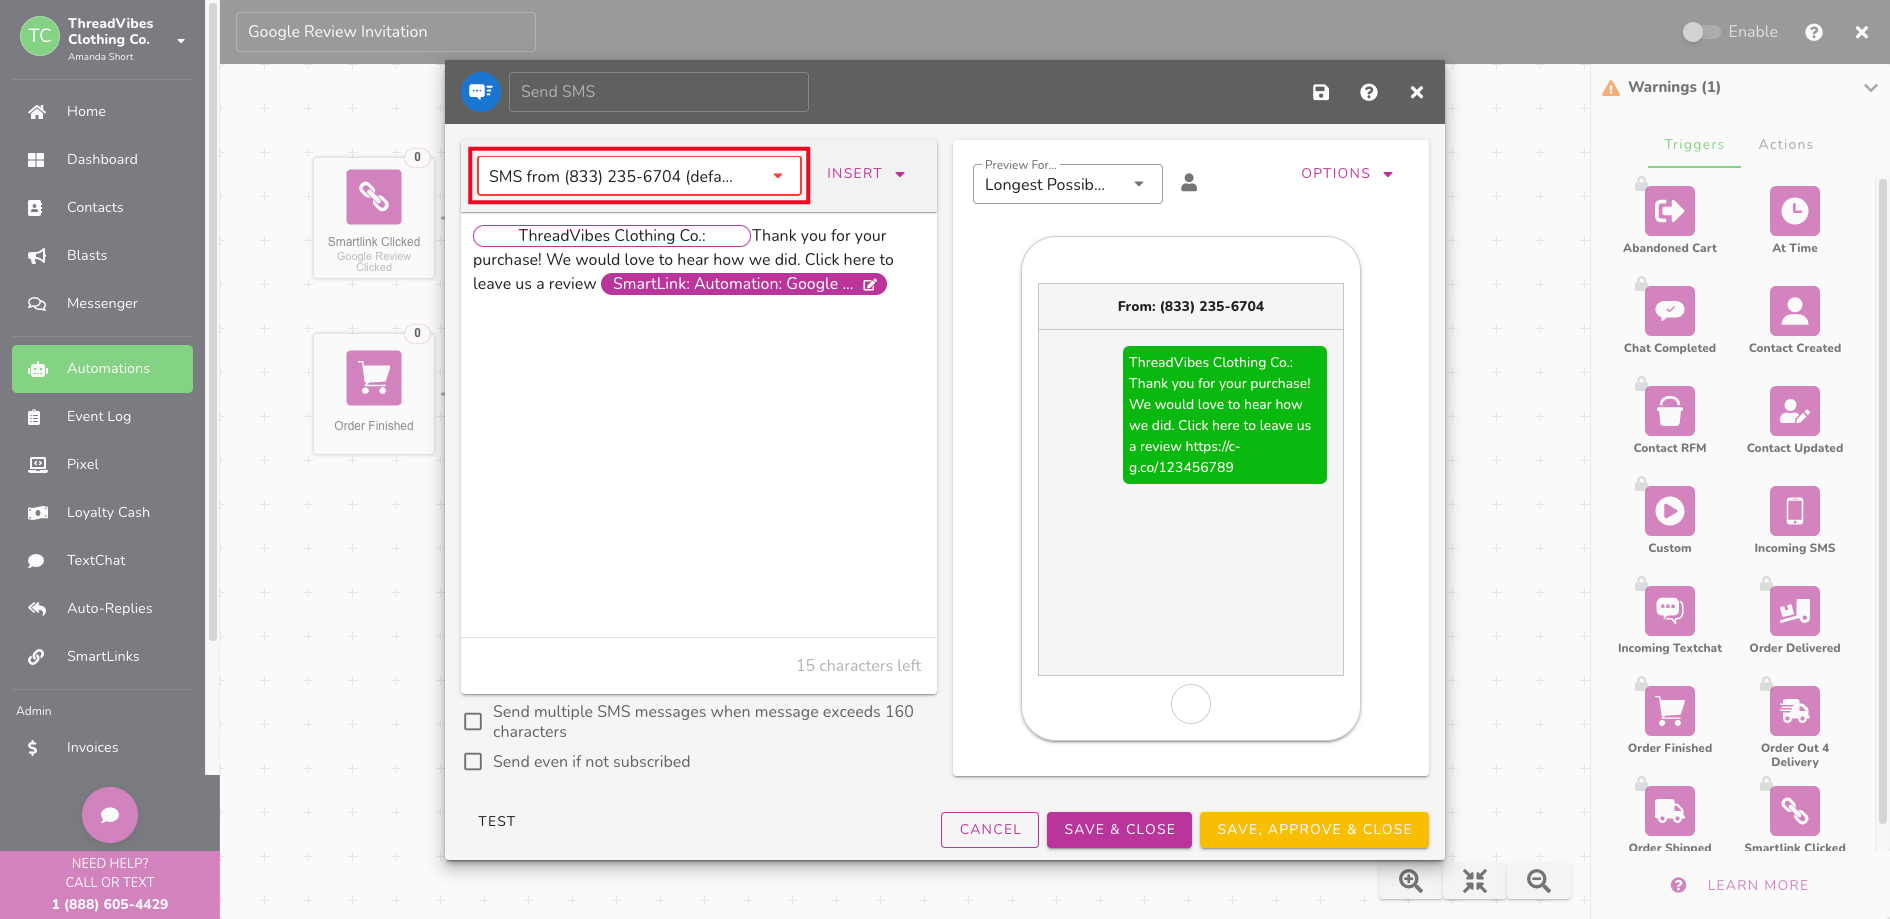
Once you are ready, enable your Automation.
Tips for effective messaging:
- Test, Test, Test! Use the SEND TEST feature to QA your campaign and make any necessary edits. Then don't forget to test again.
- Personalize your messages: Use customer data to address your clients by name and include specific details about their experience with your business.
- Keep your messages short and to the point: Clients are more likely to leave a review if your message is concise and easy to understand.
- Monitor and optimize: Continuously track the performance of your automation and make adjustments as needed to improve its effectiveness.